Dollar Tree Tape Measure Antenna
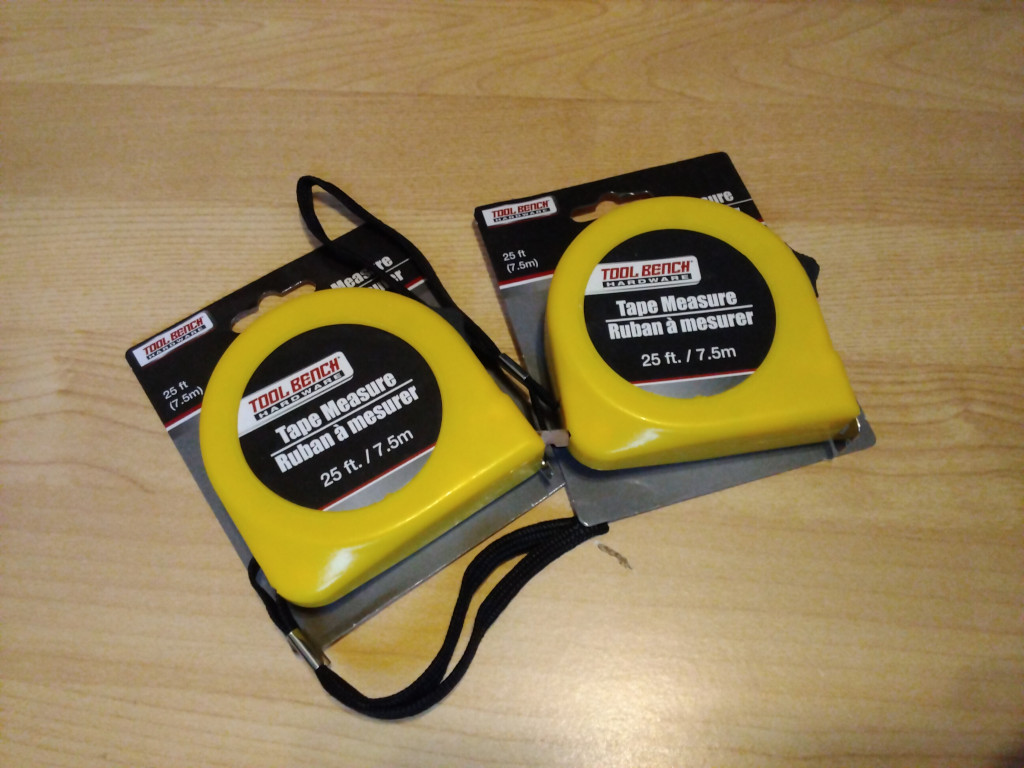
I promise I'm not at the Dollar Tree buying stuff all the time. Mostly I use them to purchase balloons or streamers for birthday parties. But when I am there, I always check to see if I can find anything to make an antenna with. This last time I was there, I noticed that they had 25' tape measures. I picked up two and added them to my purchase.
The idea for a tape measure dipole isn't novel. Heck, it's not even that creative, really. It's a dipole after all, the type of antenna that we should all be making more frequently. One nice tape measure dipole build can be found here:
Of course, the version above was made to last, with durable components nicely arranged. It set them back $26 just for the tape measures--that's $38.34 in 2024 dollars, for those of you who care about inflation. Add in the really nice aluminum channels, the fasteners and everything else, and you're looking at a DIY dipole that would cost more than $60 easily.
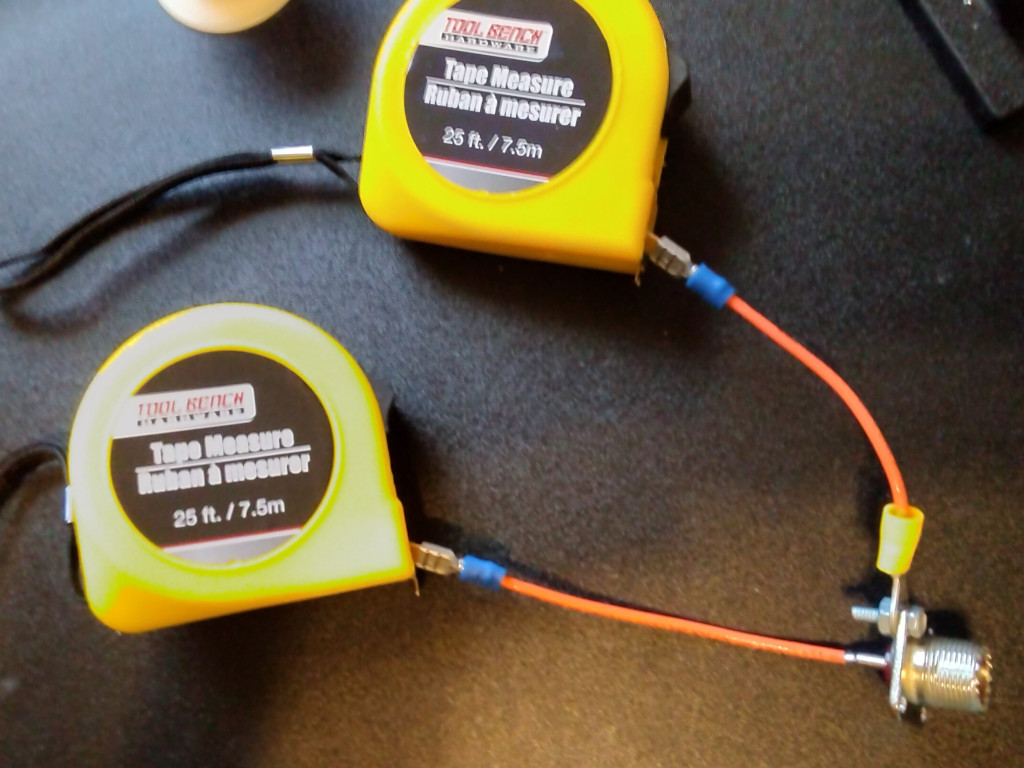
The one thing I'm not overly fond of in their design is the connection between the SO-239 and the tapes. While it may work electrically, it just doesn't seem as sturdy as the rest of the build. The issue, of course, is that they set their tape measures in the center, rather than at the ends (is that better? Will it change the signal to do it that way vs. having the unused tape at the ends? I have no idea, email me if you know!). This meant they didn't have a lot of options.
For my build, I decided to connect to the ends of the tape measures, and have them pull out from the center. This allows a more sturdy connection, as you'll see. I had everything on-hand but the tape measures. The part used were:
- 2x Dollar Tree tape measures ($2.50 total)
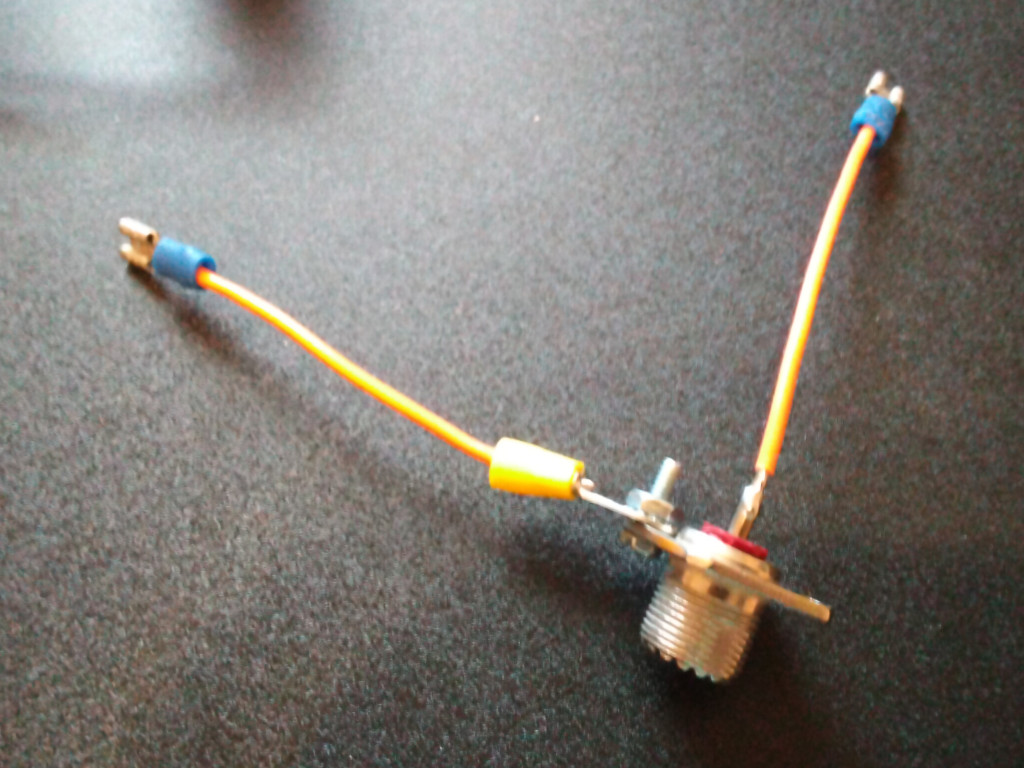
- a SO-239 connector (~$1.00)
- two bits of stranded 14AWG wired (practically free)
- a couple connectors, a nut and bolt, solder (pennies, really)
The whole thing went together in a matter of minutes. The process was:
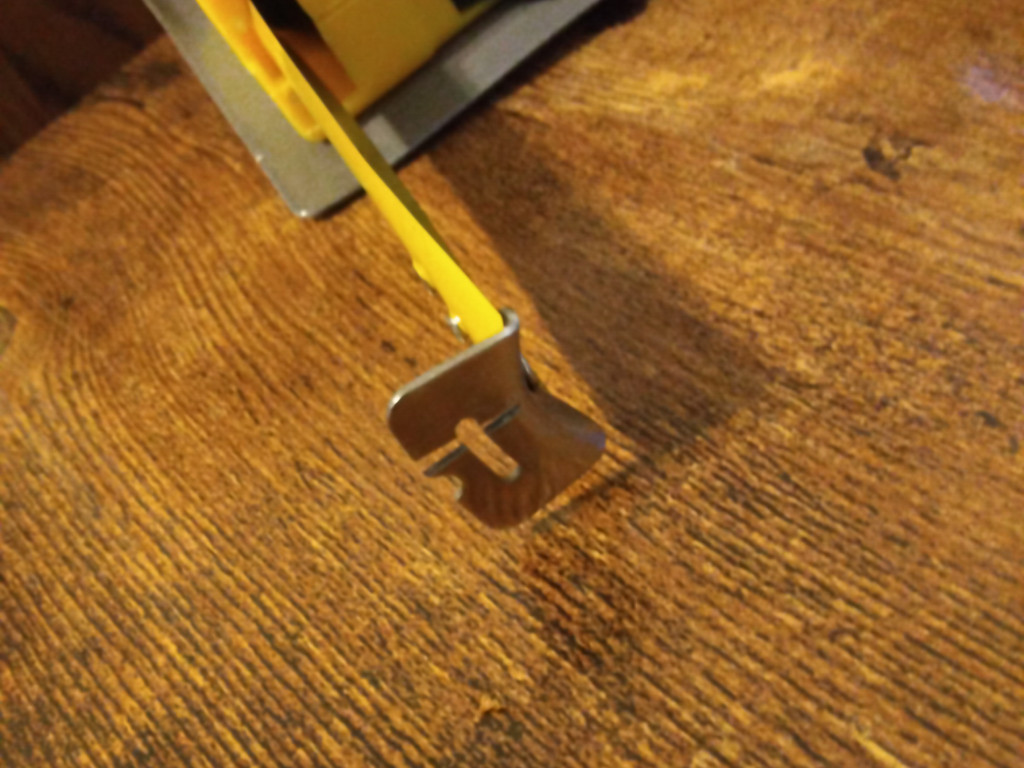
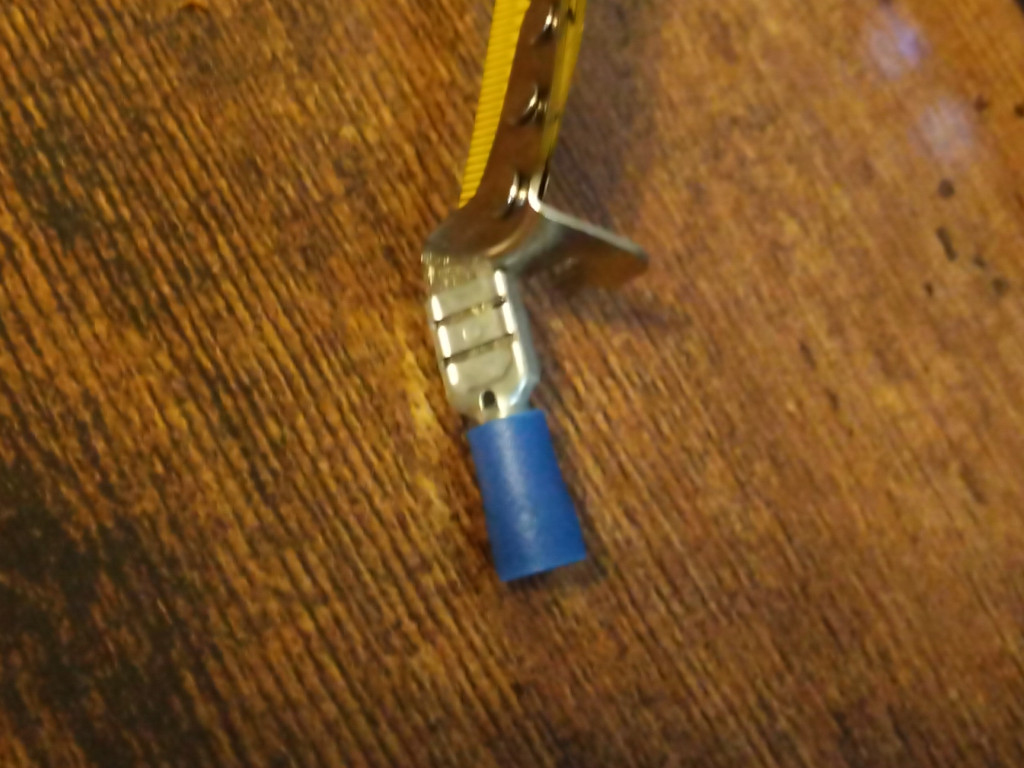
- Measure and snip the ends, then bend snipped portion up, to create tabs/terminals for connecting the wires.
- File off the paint and solder the rivets holding the end on the tape measure (we want a good connection).
- Solder up the wire bits and SO-239 connector.
- Attach everything up--done.
This thing deployed in about two minutes, under the eave of my house. Granted, I already have a dipole there, so I had a place to hang this one ready to go. The tape measures have fabric straps built-in, which I used to hang on the hooks. It was pretty handy, of course, to be able to measure out the legs with... the legs themselves. The SO-239 has some spare holes around the edges that I could have used to relieve stress from the quick-disconnect tabs, but I didn't bother. They were on there real tight, and held up to the strain fine while I was testing
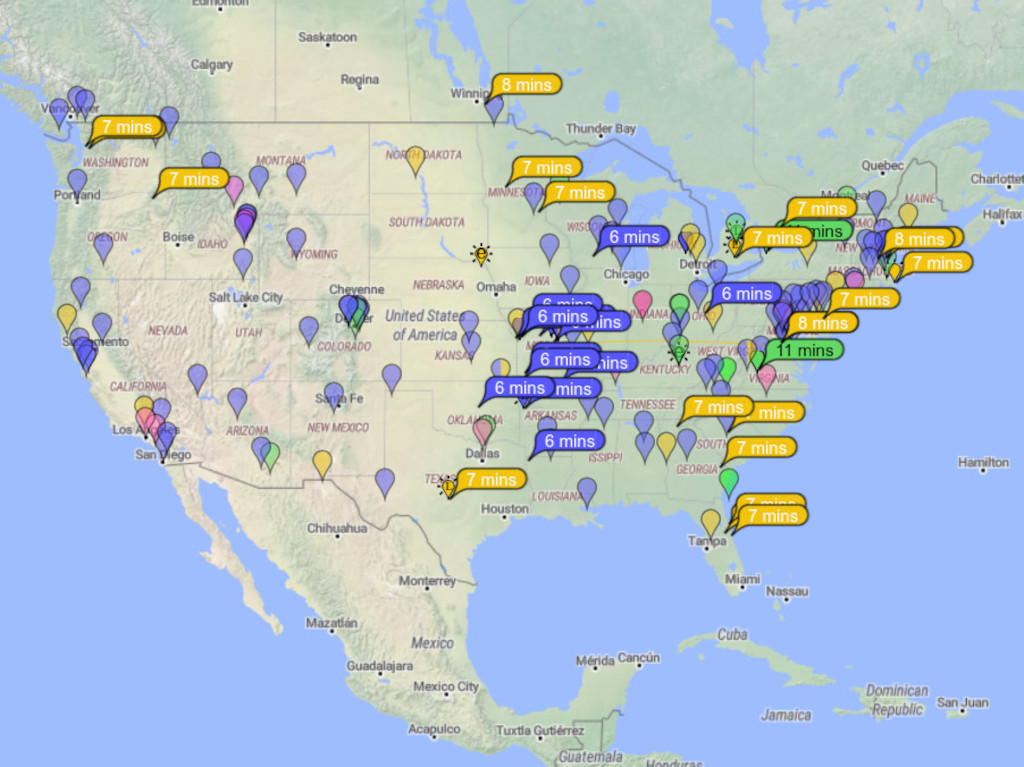
I set my legs both at about 16'5". My G90 (which I believe will tune 10:1) was able to tune that on 20m, 30m, and 40m without a problem. Seriously, if you've not used a G90's tuner, don't start, it'll ruin you for all other internal tuners. It was about noon, so bands weren't excellent. I transmitted 12w on 20m and 30m, and 6w on 40m, with the results you see in the photo up top.
For the time and effort involved, this thing beats the pants off my Dollar Tree broomstick antenna. Of course, it takes a lot more space than the broomstick vertical. The Dollar Tree tape measures are what you'd expect, and I wouldn't plan on them lasting very long. All things considered, this was fun and fast DIY to do and the results were great!